


How to Map the CI Attribute to a Web Service Field
The integration uses an adapter to transform UCMDB CI attributes to web services objects recognized by Service Manager. The adapter in turn specifies what XSL transformation files the integration should use to convert UCMDB queries into properly formatted Service Manager web services messages.
Out-of-the-box, each integration query has a corresponding XSL transformation file that maps to a particular CI type in UCMDB. In addition, each attribute for which you enabled calculation requires its own entry in the XSL transformation file. Without an XSL transformation entry, Service Manager cannot receive any CI attribute updates from your UCMDB system.
If you want to add a new attribute to the integration, you must edit the XSL transformation file for the parent CI type and add an entry for the CI attribute. For information about which CI types each query manages, see Queries for Push. In order to create a proper XSL mapping, you must be familiar with the service and object names Service Manager publishes as web services. For information on publishing tables and columns as web service objects, see Service Manager Web Services available from the Service Manager help.
The following steps illustrate how to map a UCMDB CI attribute called host_vendor to a Service Manager web service object called OSVendor.
To map a CI attribute to a web service field:
- Log in to UCMDB as an administrator.
- Navigate to Data Flow Management > Adapter Management > ServiceManagerAdapter9.41 > Configuration Files.
- Double-click the XSL transformation file that manages the parent CI type of your CI attribute. For example, open
computer_push.xsltto add an attribute to the SM Computer Push query. - Find the element that defines the Service Manager table name where the integration will store CI attribute values. For example, the element
<file.device>will store CI attributes in the Service Manager device table. - Within the table naming element (
<file.device> ), you will see an element of the following format that defines how to transform each UCMDB CI attribute into a web service object:<xsl:for-each select="@CI_attribute_name">
<SMAttributeName><xsl:value-of select="."/></SMAttributeName>
</xsl:for-each>
@CI_attribute_nameis the name of attribute in the UCMDB system.SMAttributeNameis the name of a web service attribute published by the Service Manager system.Caution The web service attribute name is case-sensitive.
CI attributes in the
computer_push.xsltXSL transformation file are illustrated in the following screenshot: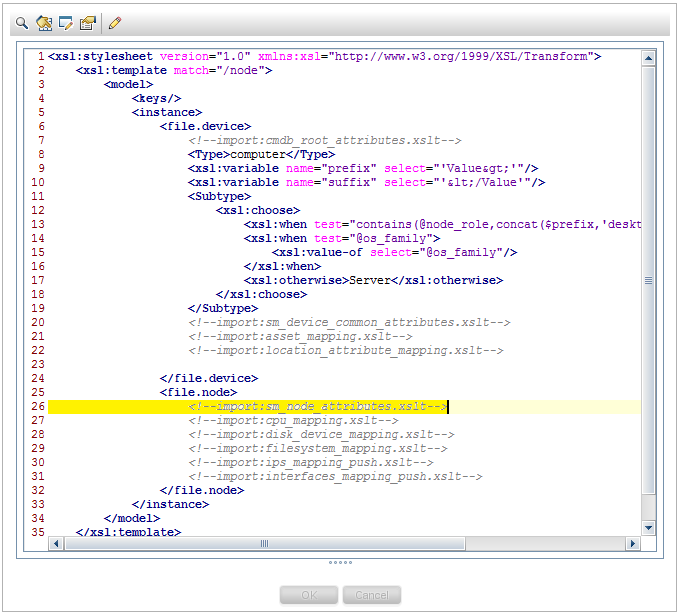
CI attributes in the
sm_node_attributes.xsltXSL transformation file are illustrated in the following screenshot: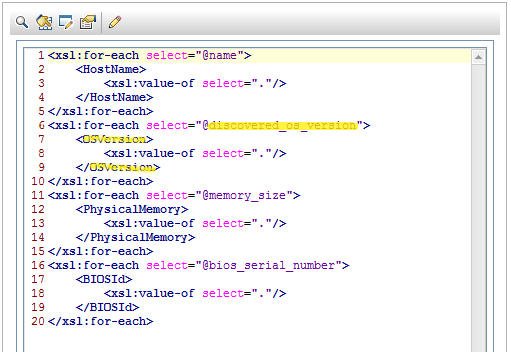
Matching CI attributes in the
ucmdbNodeweb service are illustrated in the following screenshot: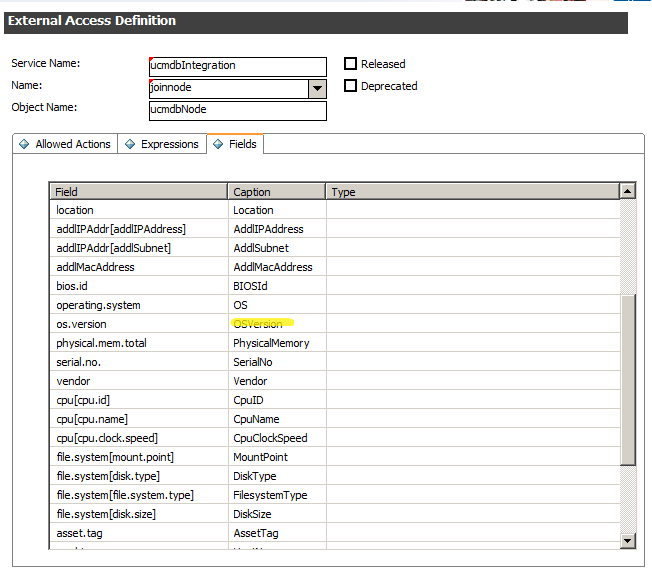
- Copy an existing XSL transformation element to use it as a template to create a new transformation entry.
- Paste the new XSL transformation element within the proper table naming element. For example,
<file.node>. - Update the CI attribute name and web service object name within the new element to match the attribute you want to add to the integration. For example, create the following XSL transformation element to add an attribute to the integration.
<xsl:for-each select="@os_vendor">
<OSVendor><xsl:value-of select="."/></OSVendor>
</xsl:for-each>
New attribute in the
computer_push.xsltXSL transformation file is illustrated in the following screenshot: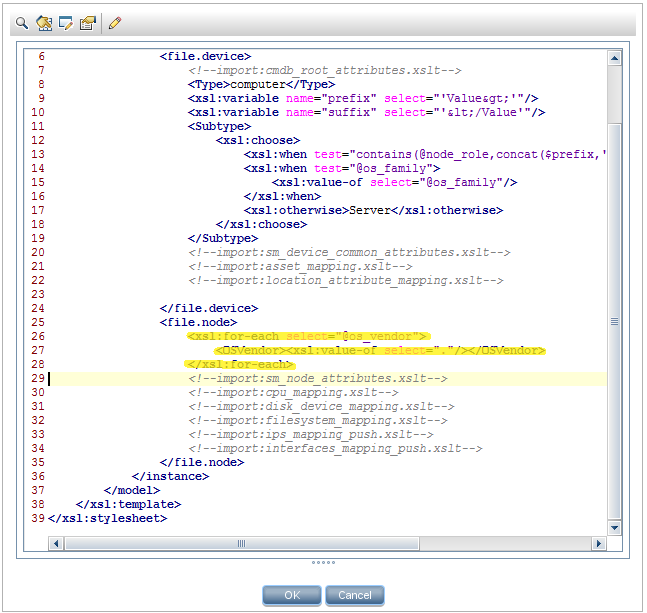
- Save the XSL transformation file.
Note When you create/edit and then save a configuration file in Adapter Management, UCMDB automatically restarts the adapter with the new configuration file.


