


Task 13: Create a trust relationship with ADFS
Currently, the only supported identity provider is Microsoft Active Directory Federation Service (ADFS) 2.0 or 3.0. ADFS helps you use single sign-on (SSO) to authenticate users to multiple, related web applications over the life of a single online session.
Once ADFS is installed and configured to authenticate users from an LDAP directory, you are ready to add the IdM metadata to ADFS to add the IdM service as a trusted relying party.
Note The screenshots in this section are from ADFS 3.0, and may slightly differ from those in ADFS 2.0.
To add the IdM service as a trusted relying party to ADFS, follow these steps:
-
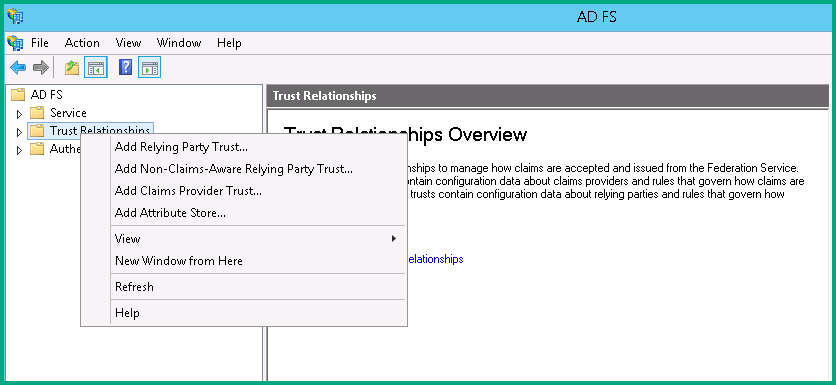
In the ADFS 3.0 Management Console, right-click Trust Relationships and then select Add Relying Party Trust.
-
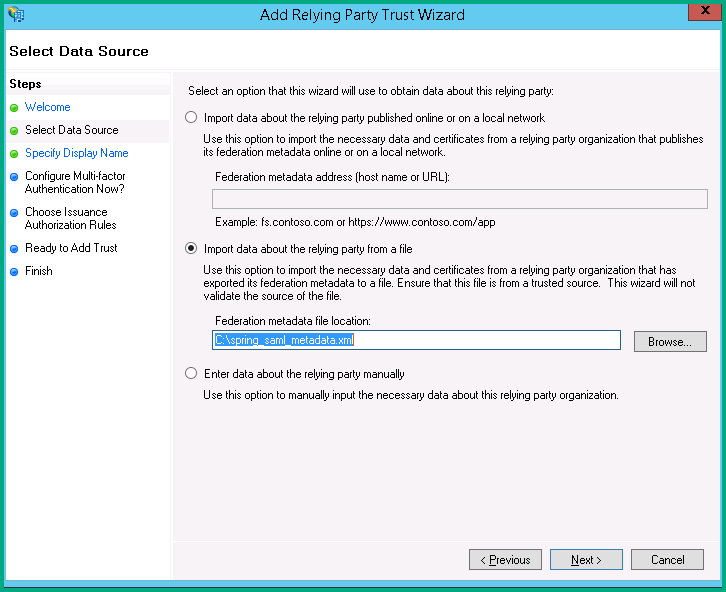
Select Import data about the relying party from a file, and then select the IdM metadata file (metadata.xml) that you created previously. Click Next.
-
The wizard may display a warning, indicating that some content of the metadata is not supported. You can safely ignore this warning.
Click OK to ignore the warning.

-
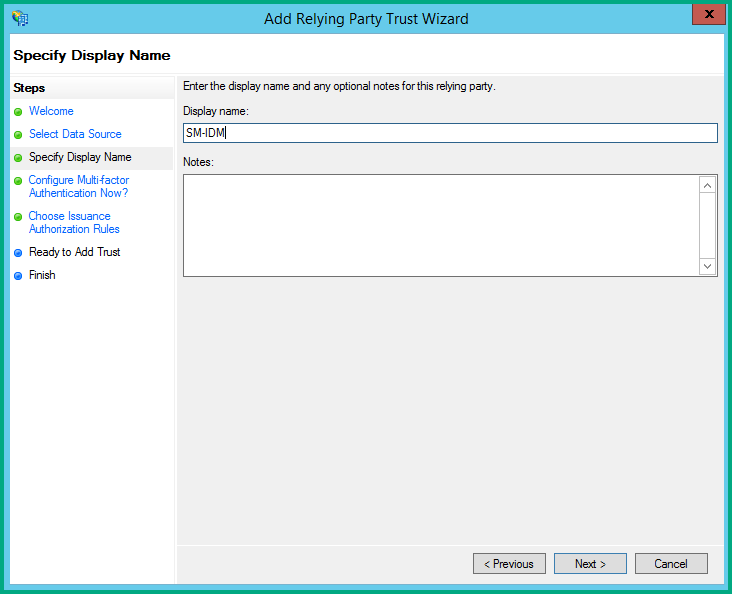
Specify a display name for the IdM service, and add optional notes. Click Next.
-
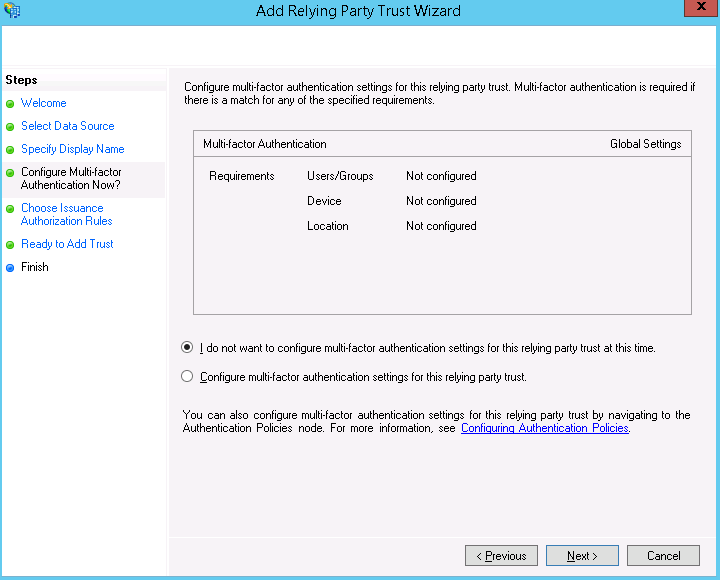
Make sure the I do not want to configure multi-factor authentication setting for this relying party trust at this time option is selected, and then click Next.
-
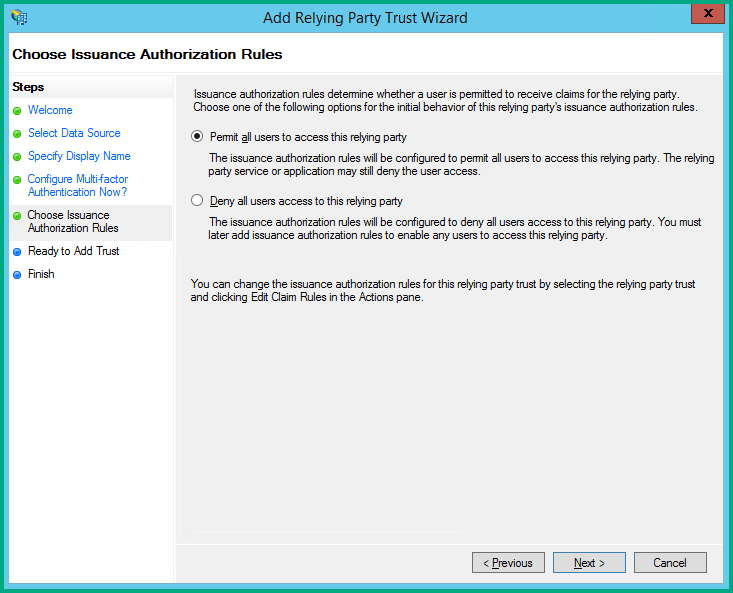
Select the Permit all users to access this relying party issuance authorization rule.
-
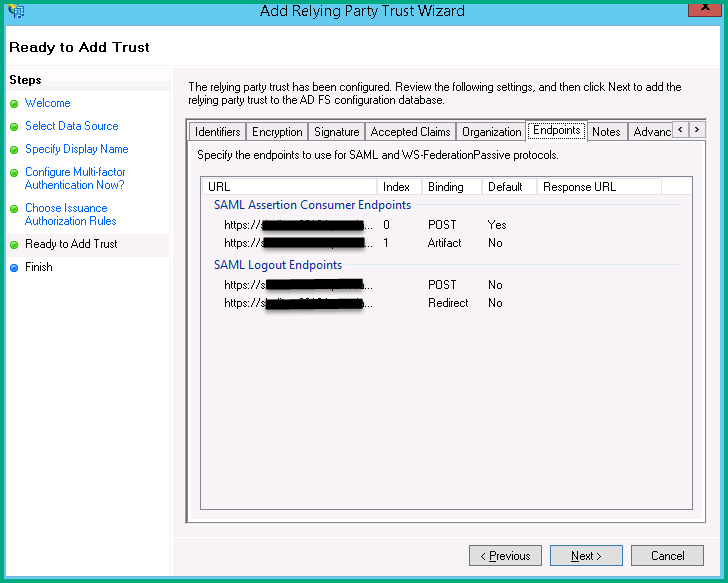
You are now in the Ready to Add Trust step. Check that the Endpoints tab contains multiple endpoint values. If not, verify that your metadata was generated with https protocol URLs.
-
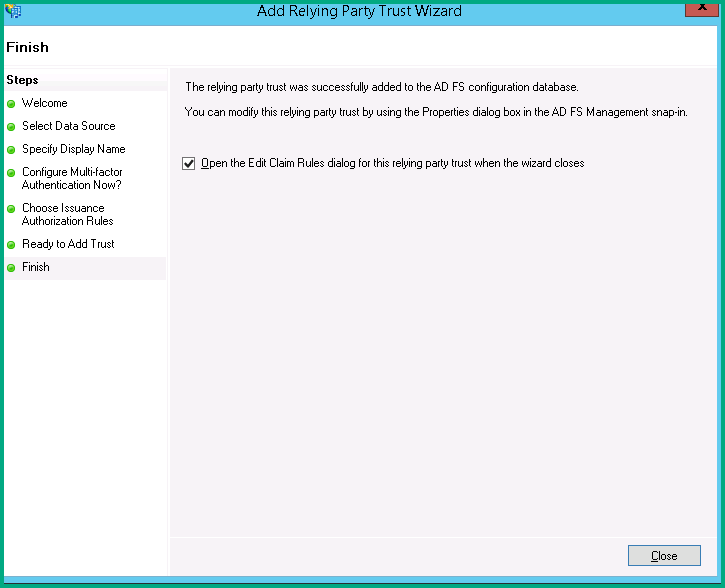
Leave the Open the Edit Claim Rules dialog checkbox selected, and click Close to close the wizard.
-
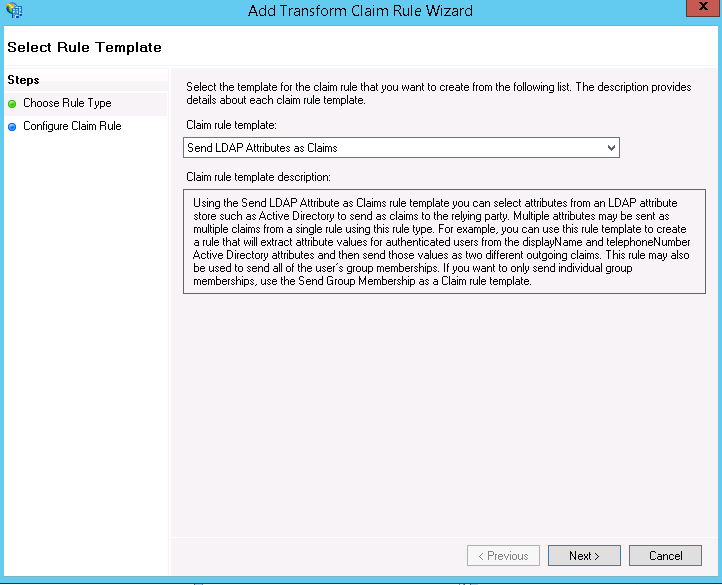
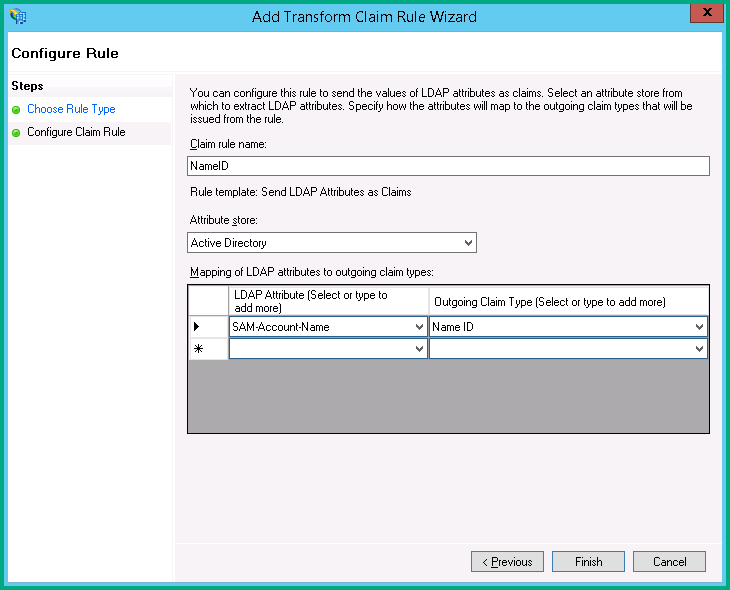
The Add Transform Claim Rule wizard opens. Perform the steps below to configure the NameID element as part of the Subject in the SAML Response message.
-
Select Add Rule, and then select Send LDAP Attributes as Claims. Click Next.
-
Specify the following fields to configure the claim rule:
- Claim rule name: enter NameID
- Attribute store: select Active Directory
- LDAP Attribute: select SAM-Account-Name
- Outgoing claim type: select Name ID
-
Close the wizard and the Apply the claim rules window.
Note In ADFS 3.0, you may need to configure the Name ID as a PassThrough claim.
-


