


Task 15: Integrate with Microsoft Skype for Business
Note This is an optional task.
Service Manager Collaboration provides an out-of-the-box Skype plugin and a Skype agent to integrate with Microsoft Skype for Business. When you start a conversation in Service Manager Collaboration, the Skype plugin that is embedded in the Openfire server monitors all the messages. If a participant does not log on to the Openfire server, the Skype plugin will use the participant’s email address as his/her Skype account and then send the message to the Skype server. If the user is available to chat, the Skype agent will launch a conversation with the right user, and then forward the message to him/her on Skype. After the Skype user replies, the Skype Agent will push this message back to the Skype plugin. Consequently, the Skype plugin will poll the in-coming Skype message and then forward it to all the other users in the Collaboration conversation.
The following diagram illustrates a sample message exchange architecture between Service Manager Collaboration and the Skype server:

Note
Lync users cannot start a conversation with Service Manager Collaboration. Instead, they can be invited to Collaboration conversations only.
In this task, you will integrate Service Manager Collaboration with Microsoft Skype for Business.
Follow these steps:
-
Download and install Microsoft .NET Framework 4.5 from Microsoft Download Center.
-
Download and install Microsoft Skype for Business 2016 from Microsoft Download Center. Service Manager Collaboration integrates with Microsoft Skype for Business 2016 only.
- Sign in to Skype by using an IT operator's Skype account. This account transfers the communication between the Openfire server and the Skype server, and hence must be effective and timely.
- Click Microsoft Skype Options > Personal, and then select None from the Personal information manager drop-down menu. Save your changes and then sign out.
-
Create the new UISuppressionMode Windows Registry value.
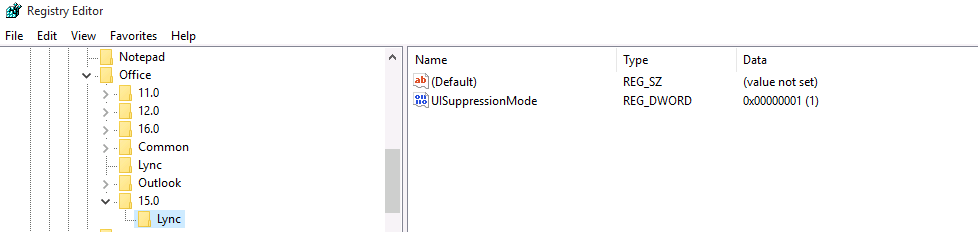
- Open Windows Registry Editor, and then navigate to HKEY_CURRENT_USER\Software\Microsoft\Office\15.0\Lync.
-
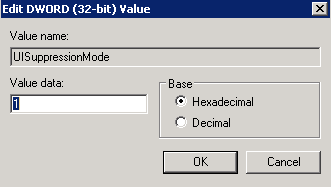
Right-click Lync, and then click New > DWORD (32-bit) value to create a new registry value.
-
Set the new value name to UISuppressionMode, and then set the value data to 1.
-
Navigate to HKEY_CURRENT_USER\Software\Microsoft\Office\16.0\Lync.
-
Right-click Lync, and then click New > DWORD (32-bit) value to create a new registry value.
-
Set the new value name to UISuppressionMode, and then set the value data to 1.
- Click OK, and then close the Windows Registry Editor.
-
Encrypt the Skype account and update the openfire.xml file.
- Stop the Openfire server.
- Navigate to the C:\Program Files (x86)\Micro Focus\Service Manager 9.60\ChatServer\conf directory, and then open openfire.xml with a text editor.
-
Locate the
<lyncIntegration>section. -
Update the
<lyncIntegration>section as follows:<lyncIntegration> <enabled>true</enabled> <auth> <!-- Put plain lync user name and password here, it will be automatically encrypted after server startup and encrypted="true" will be added to the userName and password elements. When you change your Lync userName or password, you must remove encrypted="true" and replace the encrypted string with the new plain string. --> <userName><YourLyncAccountName></userName> <password><YourLyncPassword></password> </auth> <startLyncAgent>true</startLyncAgent> </lyncIntegration>
Note You need to enable Skype integration first, and then replace
<YourLyncAccountName>and<YourLyncPassword>with the user account with which you signed in to Skype in step 3.Caution
- When the IT operator's Skype password is changed, the <YourLyncPassword> value in openfire.xml must be changed accordingly.
- You must not sign out the IT operator's Skype account which transfers the communication between the Openfire server and the Skype server. Otherwise, Service Manager Collaboration does not work.
- Save and close this file.
-
Start the Openfire server.
See the following screenshot for an example of the encrypted
<lyncIntegration>section in openfire.xml: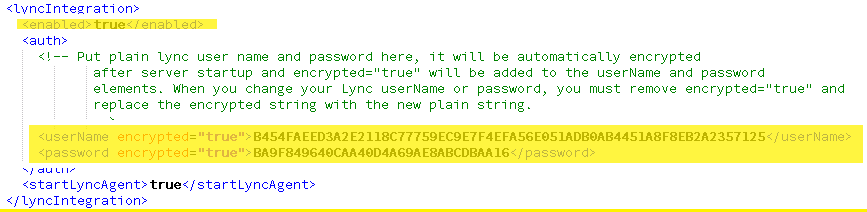
-
Enable Service Manager Collaboration to communicate with the Skype server.
- Log on to Service Manager as a system administrator.
- Click System Administration > Ongoing Maintenance > Collaboration > Configuration to open the Collaboration Settings form.
- Select the Enable ESS Skype User check box so that the Service Manager Skype users can join Collaboration conversations by using Skype.
Now you can communicate with the Skype users in a Service Manager Collaboration conversation.
Caution To integrate with Microsoft Skype for Business, follow these steps to specify the log on account for the Openfire service before starting it as a standard Windows service:
- Right-click the Openfire service in the Windows Services window, and then select Properties.
- Click the Log On tab.
- Select This account, and then specify the same IT operator's Skype account used in step 3.
- Click Apply and OK.


