


Add an fsyslib Knowledgebase
User role: System Administrator, KMAdmin
File systems can be crawled to create fsyslib-type knowledgebases. File system crawling enables administrators to make the knowledge in a file system outside of Service Manager accessible to users and to reduce administration costs.
To add an fsyslib-type knowledgebase:
- Click Knowledge Management > Configuration > Knowledgebases.
- Type a unique name for the new knowledgebase in the Knowledgebase name field (required). For example, My_FYS.
- Type a display name for the knowledgebase (required). For example, My File System.
- Select fsyslib in the Type field list.
- Click Add. The knowledgebase record is added.
-
Configure the Type information tab.
Field Description Directories
- Start Path: Type the Universal Naming Convention (UNC) directory path. You can enter more than one path, but use only one path per line. If the starting directory is hosted on a UNIX server, also specify:
- Replace this UNIX path: The UNIX directory to substitute with the Windows mapping to the UNIX server path.
- With this Windows mapping: The Windows mapping to the UNIX path.
This translation of the mapped path is necessary so that the Windows client loads the knowledge article from the correct location when displaying it in the hitlist after a search.
For example:
Start Path:/samba/test/webcrawltest
Replace this UNIX path:/samba/test
With this Windows mapping:\\blade100\test\\<UNIX mapping on Windows>
Path depth: Limits indexing to the specified number of path segments in the file system path. The default is 100 path segments.
The path length is determined as follows:
- The host name (for example,
\\hostname) is not included in determining the path length. - All elements following the host name are included and determine the path length in the path name, including the actual file name (for example,
\world.htm) if it is present. - Any directory paths between the host and the actual file name are included.
Example: For the following UNC path, the path length would be 4:\\host\comics\fun\funny\world.html
where:
comics = 1 segment
fun = 1 segment
funny = 1 segment
world.html = 1 segment
Mime Types - Unlimited: The search engine supports over 1,200 different MIME types. Selecting "Unlimited" will include this full list of MIME types during crawling.
- Include: List the MiIME file types to be included in the index. Specify the file type by using the MIME specification. Enter only one MIME type per line.
You may use the "*" wildcard only for MIME types. For example, "text/*". This example will include all the MIME types that start with "text/". - Exclude: List the file types NOT to be included in the index. Specify the file type by using the MIME specification. Enter only one MIME type per line.
You may use the "*" wildcard only for MIME types. For example, "text/*".
This example excludes all the MIME types that start with "text/".
The default values in the drop-down list for MIME types can be configured as follows:
- Go To Tailoring > Database Manager.
- Search for the kmmimetypes table to retrieve the full list of MIME types.
- Check the Mimelist box, so that the all available MIME types will appear in the drop-down list.
- Save your changes.
Security Scripts - Knowledgebase access script: This script specifies the script the system uses to determine if a particular user has rights to access the knowledgebase. See the default script for more detailed information.
- Search security script: This script further limits what the user has access when given access to the knowledgebase. This script returns a query string that is added to the user's normal query to limit the scope of the particular user's access to documents in the knowledgebase. See the default script for more detailed information.
- Category index script: This script processes the document category so that the indexer can translate the document’s category into a string that the search engine can use later to find the document based on the user’s category access.
- Advanced search script: This script processes a string of library-specific query values using the KMQuery object. The values in KMQuery were entered by the user under the tabs in the Advanced Search screen. You can tailor this script if this knowledgebase has a tab in the Advanced Search screen.
- Default locale: Specifies the default language used by the search engine when searching and indexing. By default, the language code matches the language you logged in as.
-
Configure the Field Definitions tab.
Column Description Field Type Select Constant. You may alias the 'constant' field as you would any other field. Every document indexed will have a field with the name you specified and the value listed in this field. Constant fields can be used for search security, categorization, or similar types of data that you do not have edit access to.
Example constant: $PASSAGE_BASED_SUMMARYField Name Define a unique name for your 'constant' field in the Field Name. Alias This is the name of the field as it is to be indexed. You can make use of the Alias field to have a single common field name for searching and for the hitlist. Data Type Specify the Data Type for date fields to allow date range searching. Hitlist Defines what fields are available on the search hitlist. Fields marked as 'true' in the Hitlist field are available to be included on a search results hitlist display. Value Specify the value for the 'constant' field.
Note: The Value field is not used for a field type meta tag.
-
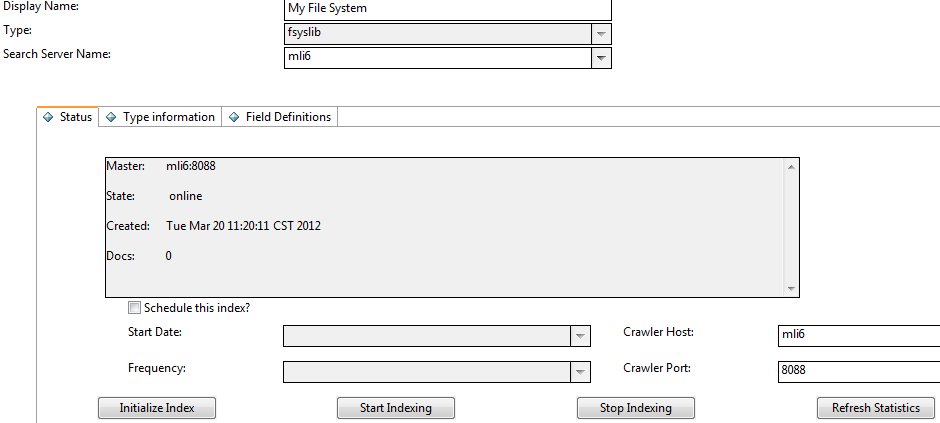
View the Status tab.
Field Description Master, Slave, or Load Balancer This field provides information about the search servers that are connected to the selected knowledgebase. Details on each server connection include type of server (Master, Slave, or Load Balancer), state of the server, date the server was created, and the number of documents that were indexed in the knowledgebase. For more information, see State, Created, and Docs.
To make changes to a search server, go to Knowledge Management > Configuration > Configure Search Servers and select the search server.
State Displays whether the collection is online or offline. If the knowledgebase has not been created, this field is blank. Created Displays the knowledgebase creation date and time. If the knowledgebase has not been created, this field is blank. Docs Displays the number of documents contained in the index. If the knowledgebase has not been created, this field is blank. If the knowledgebase has been created but not indexed, this field will show 0 documents. Status Since the index is created separately from the knowledgebase creation, the Status field displays the current status of the index. Values can be "Not Created", "Created", "Running", and "Finished". Schedule this index? You can choose to schedule the index to start on a particular day and time. Select the Schedule this index? check box to enable scheduling. Start Date Select the first day you wish this index to run. Adjust the time values to the time of day the index should run. Frequency You can schedule the index to run once, hourly, daily, weekly, or monthly.
For example, If you scheduled the index to run on Monday, May 5, at 6 p.m. and selected hourly for the frequency, the index would run the first time on Monday, May 5, at 6 p.m. and would then run again at 7 p.m., 8 p.m., and so on until you updated the schedule.When indexing, the search engine only indexes documents that have changed since the last run.
Crawler Host Specify the host name of a search server for web crawling. Crawler Port Specify the Tomcat port of the crawler host. This tab also contains the following indexing buttons:
Button Description Initialize Index Once you have all your settings specified for a new knowledgebase, click this button. The system sends the settings to the search engine. The search engine creates the empty knowledgebase for index. After a knowledgebase and index have been created, click this button to erase the index and create an empty knowledgebase. You should create a new knowledgebase if you change the parameters on either the Type information tab or Field Definitions tab. Start Indexing Click this button to start an index manually. Instead of scheduling index updates, you can use this button if the file system you are crawling does not change or if you want to test index settings once. Stop Indexing Click this button to stop an indexing process that is running. Click the Start Indexing button to resume indexing from the point where the index was stopped. To start indexing from the beginning, see Initialize Index. Refresh Statistics When selected, the search engine refreshes the statistics of the indexing process to show how many documents are indexed and searchable at that time in the process. -
Click Initialize Index to index the new fsyslib knowledgebase.
- Click Save.
-
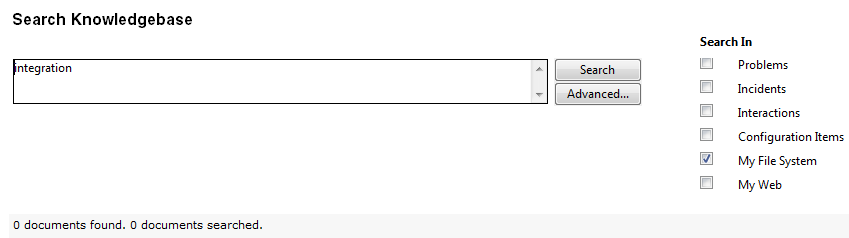
Perform a test search on the new fsyslib knowledgebase to verify that it is set up correctly.
Related topics


