


Maintain NPS
This topic includes the following sections:
- Modify the FQDN of the NPS System
- Modify the Default Communication Port
- Modify NPS JDK
- Maintain the NPS Database
- Tune NPS
- Log Files
After installing and configuring NPS, you might want to make changes to your environment like changing the IP address or hostname of the NPS system or the NNMi management server. You might want to free up ports used by NPS and configure non-default ports for NPS. This chapter provides you with steps to make these changes after NPS is completely installed and configured.
Modify the FQDN of the NPS System
If you change the FQDN of the NPS system, you must perform the following steps before using NPS:W
- Log on to the NNMi management server as root or administrator.
-
In a co-located setup.
If NPS co-exists with NNMi, you must run the
nnmsetofficialfqdn.ovplcommand.- Go to
%nnminstalldir%\binon Windows and/opt/OV/binon Linux. - Run the
nnmsetofficialfqdn.ovplscript. -
Go to
%nnminstalldir%\NNMPerformanceSPI\binon Windows and/opt/OV/NNMPerformanceSPI/binon Linux. - Run the
configureServerID.ovplscript. - Go to
%nnminstalldir%\binon Windows and/opt/OV/binon Linux. -
Run the
nnmenableperfspi.ovplscript.The following prompt appears:
Do you wish to use the prior selections as defaults? (Y/N):
- Type Y, and then press Enter.
-
Press Enter for all prompts.
- Go to
-
In a dedicated NPS setup.
If NPS is installed on a dedicated server:
-
On the NNMi management server, run the
nnmdisableperfspi.ovplscript.The
nnmdisableperfspi.ovplscript is available in the%nnminstalldir%\bindirectory on Windows and/opt/OV/bindirectory on Linux. -
Linux only. If NPS is installed on Linux, run the following command on the NPS system to unmount the shared drive that was created to facilitate data exchange between NPS and NNMi.
umount /<share_name>
In this instance, <share_name> is the name of the share created while installing NPS.
-
On the NPS system, run the configureServerID.ovpl script.
The
configureServerID.ovplscript is available in the%npsinstalldir%\bindirectory on Windows and/opt/OV/NNMPerformanceSPI/bindirectory on Linux. -
On the NNMi management server, run the
nnmenableperfspi.ovplscript.The
nnmenableperfspi.ovplscript is available in the%nnminstalldir%\bindirectory on Windows and/opt/OV/bindirectory on Linux.
-
Modify the Default Communication Port
By default, NPS uses the port 9300 (for HTTP) or 9305 (for HTTPS) for communication via a web browser.
After NPS is installed and configured, you can modify the NPS configuration to change the NPS communication port.
If NPS is configured for HTTP communication, run the following command to change the communication port:
configureWebAccess.ovpl -newport <port_number>
If NPS is configured for HTTPS communication, run the following command to change the communication port:
configureWebAccess.ovpl -newport <port_number> -ssl
(When NPS is installed in a high availability cluster, perform this task on the active server first, fail over to the other server, and then perform the task again on the server that is currently active.)
In a distributed deployment of NPS, perform this task on the UiBi Server:
- Log on to the NPS system as root or administrator.
-
If NPS is configured for HTTP communication, run the following command:
configureWebAccess.ovpl -newport <port_number>
If NPS is configured for HTTPS communication, run the following command:
configureWebAccess.ovpl -newport <port_number> -ssl
In this instance, <port_number> is the new communication port number.
Modify NPS JDK
After installation, you can configure NPS to use a different instance of JDK (version 1.8) that is present on the NPS system.
To make this modification:
- Log on to the NPS system.
-
Go to the following directory:
- Windows:
%ovinstalldir%\NNMPerformanceSPI\bin - Linux:
/opt/OV/NNMPerformanceSPI/bin
- Windows:
-
Run the following command:
- Windows: updatenpsjdk.ovpl <JDK_bin_path>
- Linux: ./updatenpsjdk.ovpl <JDK_bin_path>
In this instance, <JDK_bin_path> is the complete path to the
bindirectory of the new JDK.
Maintain the NPS Database
The NPS database store a large amount of data that is gathered from different sources (like NNMi and iSPIs) and enables NPS to compute aggregates from a large number of data points. The database can keep daily aggregated data for up to 800 days, hourly aggregated data for up to 400 days, and raw/detailed data for up to 400 days.
With scripts and utilities available with NPS, you can monitor the health and performance of the database and perform maintenance tasks like checking the health of the database, deleting and recreating the database, and so on.
Change the Default Database Password
The NPS installer installs the NPS database with a default password.
To change the default database password, log on to the NPS system as root or administrator, and then run the following command:
changeDBpwd.ovpl <new_password>
In this instance, <new_password> is the password of your choice.
In a distributed deployment of NPS, you must run the above command on each NPS system in the following order:
1. DB Server
2. UiBi Server
3. ETL Server
Check the Database Health
The dbsize.ovpl utility enables you to check the health of the NPS database.
To use the dbsize.ovpl utility to check the health of the NPS database:
1. Log on to the NPS system as root or administrator. In a distributed deployment of NPS, log on to the DB Server as root or administrator.
2. Open a command line console, and then run one of the following commands:
| Command | Description |
| dbsize.ovpl -q |
The command output displays the usage summary of different dbspaces within the database. (NPS creates the following dbspaces within the database: IQ_SYSTEM_MAIN, IQ_SYSTEM_ TEMP, and USER_MAIN). |
| dbsize.ovpl -s | The command output displays the size of different fact tables for each Extension Pack. |
| statusDB.ovpl | The command output displays the status of the NPS database. |
Back Up and Restore
NPS provides command-line tools that back up and restore all NPS data.
Before you begin, make sure sufficient disk space exists on the NPS system to run the backup procedure and store the backed-up data. Determine the size of the NPS database, content store, and configuration and archived data files.
To determine the size of the NPS database, run the following command:
dbsize.ovpl -q
To determine the size of the content store, run the following command:
cssize.ovpl -q
To determine the total size of all configuration and archived data files, measure the size of the following directory:
On Windows
%npsdatadir%
On Linux
/var/opt/OV/NNMPerformanceSPI
- Log on to the NPS system with the same account used to install NPS.
-
Run the following command:
backup.ovpl -b <dir> [-c] [-d] [-f]
In this instance, <dir> is the location where you want to place the backed-up data. Do not use environment variables with this option.
Options
- Use the -c option to back up the content store.
- Use the -d option to back up the database.
- Use the -f option to back up all NPS configuration and archived data files.
- Use the -t option to suppress creating a single compressed archive (tar.gz) file. This option leaves the directory as is on the file system, and greatly speeds up the backup process.
You must specify a valid directory location as an argument of the -b option. If you do not specify any other options, the backup script will back up the content store and the database.
The duration of the backup process depends on the size of the database. Before you start the backup process, verify the amount of disk space used by the data you want to back up, and make sure the system has enough free disk space. Although the script produces compressed output, the backup process requires sufficient temporary disk space.
To restore NPS data:
- Log in to the NPS system with the same account used to install NPS.
-
Run the following command:
restore.ovpl [-h] [-b <file>] [-l] [-r DBFILE=>NEW_PATH_TO_DBFILE.iq[,DBFILE=>NEW_PATH_TO_DBFILE.iq]]
In this instance:
| -h |
displays this text |
| -b <file> |
specifies backup file |
| -l |
lists file content without restoring |
|
-r DBFILE=>NEW_PATH_TO_DBFILE.iq [,DBFILE=>NEW_PATH_TO_DBFILE.iq] |
allows one or more database file to be restored to the specified (non-default) location |
The restore operation overwrites all preceding NPS data.
When the restore is complete, the ETL service will not be running. You must restart the service to resume the processing of new data. To start ETL, run the startETL.ovpl, startALL.ovpl command, or use the Start button on the Configuration Utility.
If you change the password of the database after a backup operation, you must change it again after restoring the backed-up database.
Incremental Backup
A comprehensive backup strategy is essential for disaster recovery. Although full backups are simple to implement and easy to execute when restoration is required, they can slow down processes that are running, take a long time to complete, and require large (sometimes excessively large) amounts of storage.
Incremental backups, however, can balance speed, resource conflicts, and required storage against ease of restoration.
The purpose of a backup is to provide a recovery point. Different systems have different requirements for recovery points. A backup strategy that offers daily recovery points can be implemented through a weekly schedule of full backups combined with incremental daily backups on all other days.
For additional security, each backup should be stored on removable media and made secure. This should also include creating several generations of media.
To implement a backup strategy that incorporates four generational copies:
-
Run a full backup.ovpl backup on a weekly basis.
Use no backup flags (that is, c, d, or f) so that the database, the content store, and the file system are backed up.
Here is an example:
-
Linux:
$NPSInstallDir/bin/backup.ovpl -b /var/backup/full
-
Windows:
%NPSInstallDir%\bin\backup.ovpl -b E:\backup\full
-
-
Copy the backed up data to one of four versions of backup tapes.
Backup tapes should be kept off site. Alternatively, they can be created directly using WAN links to copy data.
-
Run an incremental backup on a daily basis.
Use no backup flags (c, d, or f) , so that the database, the content store, and the file system are backed up.
Use the optional –i flag to perform an incremental backup.
Here is an example:
-
Linux
$NPSInstallDir/bin/backup.ovpl -b /var/backup/incremental -i
-
Windows
%NPSInstallDir%\bin\backup.ovpl -b E:\backup\incremental -i
Only changes since the last backup (full or incremental) are saved.
-
-
Copy the backed up data to one of four backup tapes.
Append the data. Do not overwrite existing backed up data.
If restoration is required:
- Restore from the desired full backup. See the reference page or man page for restore.ovpl.
- Restore (in sequential order) each incremental backup from oldest to most recent.
When restoring an incremental backup that includes the content store, you must restore each backup in turn without starting the BI Server. If you start the BI Server, it will write to the content store database and prohibit restoring from any further incremental backups.
If you do write to the content store database before restoring an incremental backup, you must return to the full backup and start the restoration process again.
Back Up and Restoring on the Same System
If the backup is restored on the same system with the same installation directories and product version as the backup, the entire contents of data directory will be restored, including all configuration files, archived data files, the database, and the content store.
Restore a Backup Made on a Previous Product Version
Backups made on earlier product versions can be restored with some limitations.
- User configurable settings (retention and installed Extension Pack list) are merged into the current settings.
- The database and content store are restored.
- Other (internal) configuration files are not restored. The restore command
- Archived data files are not restored.
- All Extension Packs must be installed again to ensure that the reports and database structures are upgraded to the latest version.
Prerequisite for Restoring a Backup Made on NPS 10.00 or Lower
Skip this procedure if you want to restore a backup made on 10.10 (or higher).
To restore the data backed up on NPS 10.00 or lower, make sure that the source NPS database password match the target NPS 10.21 database password.
As a best practice, you must always change the default NPS database password after installation by running the following command:
changeDBpwd.ovpl <password>
In this instance, <password> is the non-default NPS database password.
To restore the data backed up on NPS 10.00 or lower, make sure that the source NPS database password matches the target NPS 10.21 database password.
If the source NPS system had a different database password, run the following command on the target NPS 10.21 system before beginning the restore procedure:
changeDBpwd.ovpl <old_password>
In this instance, <old_password> is the non-default NPS database password that was configured with the source NPS system.
Restore Data
To restore the data that was backed up on a previous version of NPS:
In a distributed deployment of NPS, you must perform these steps on the DB Server.
- Transfer the backup file to the NPS system
- Log in to the NPS system as root or administrator.
-
Run the following command:
restore.ovpl -b <backup_file>
In this instance, <backup_file> is the backup file.
If the command fails to work and shows an error message (C API (dbcapi) could not be loaded), open a new command prompt and run the command again.
-
After running the restore.ovpl command:
-
Run the Configuration Utility again and check that all the settings (share name, user name, data retention periods, and so on) are correct.
To open the Configuration Utility, run the following command:
runConfigurationGUI.ovpl
-
Run the following command to configure the communication protocol and port:
configureWebAccess.ovpl -newport <port_number> [-ssl]
In this instance, <port_number> is the communication port that you have chosen while running the nnmenableperfspi.ovpl command. Use the -ssl parameter only if you want to use the HTTPS communication.
-
Run the following commands:
-
initializeNPS.ovpl -a StartBIServer
-
initializeNPS.ovpl -a SetupCSRolesAndSecurity
-
initializeNPS.ovpl -a ConfigBIAccess
-
initializeNPS.ovpl -a RestartBIServer
-
startDB.ovpl
-
addSdkUser.ovpl -u npssdkuser
-
changeSdkUserPwd.ovpl -u npssdkuser -p HP_NPS
-
-
Run the following command to complete the upgrade of each Extension Pack:
installExtensionPack.ovpl -x -e <Extension_Pack>.tar.gz
In this instance, <Extension_Pack> is the name of the Extension Pack bundle.
To view the names of Extension Pack bundles, run the following command:
about.ovpl
-
Run the following command if the Path Health Extension Pack was in use with the previous version of NPS:
installPathHealth.ovpl -e Path_Health.tar.gz
-
Run the following command if you created security groups in NNMi:
installUgSg.ovpl -e ugsg.tar.gz
-
Run the following command if Custom Poller Extension Packs were in use with the previous version of NPS:
initializeNPS.ovpl -a InitializeCustomCollections
-
Restore a Backup Made on a Different System with Different Installation Directories
Backups made on a different system with different installation directories can be restored with some limitations.
- User configurable settings (retention and installed Extension Pack list) are merged into the current settings.
- Other (internal) configuration files are not restored.
- Archived data files are not restored.
- The database and content store are restored.
- All Extension Packs must be installed again to ensure that the reports and database structures are upgraded to the latest version.
- You might have to rerun the nnmenableperfspi.ovpl script and Configuration Utility.
Restore a Backup When Additional Files Were Added to Extend the Database
If the dbsize.ovpl utility was used to extend a database by adding additional files to the DBSPACE, the backup will attempt to restore these files to the same directory as the standard database files.
To relocate database files during a restore:
The -r option enables you to identify one or more DBFile names and corresponding OS path or file name locations where each should be restored.
When dbsize.ovpl is used to add files, the DBFile names used will look like perfspi_USER_MAIN_<timestamp>. You can use the -l option to determine the files to be included in your backup (for backups made on 9.20 and later).
You can specify a different OS path or file name when restoring by using the -r option; for example, restore.ovpl -b backup.20111027135608.tar.gz -r "perfspi_USER_MAIN_3466235673656=>C:/newlocation/perfspi_USER_MAIN_3466235673656.iq".
If you backed up the content store using the standard backup utility provided in earlier releases, you will not be able to restore them in the current release. The current database backup format is incompatible with earlier releases.
Post-Restore Steps on Windows
- Skip this section if NPS is installed on Linux.
After restoring the NPS data on a new system, you must run the following commands on the NPS system:
Run the commands by logging in as the user that was configured while running the nnmenableperfspi.ovpl command.
- addSdkUser.ovpl -u <user_name>
- changeSdkUserPwd.ovpl -u <user_name> -p <password>
In this instance, <user_name> is a user name of your choice and <password> is a password that you need to choose for <user_name>.
If you do not run the above commands, you will not be able to use the Performance Analysis inventory view and the Interface Health and Component Health dashboards in the NNMi console.
Recreate the NPS Database
You can recreate your Sybase IQ database and start over with the installation default size of 2.5 GB. This feature can be useful if your existing database has grown too large, or if you want to lower your retention settings. Lowering the retention settings will maintain the smaller size of the database for a longer period of time. The resetNPS.ovpl utility enables you to delete and recreate the NPS database.When the NPS database becomes irrecoverably corrupt, you can delete and recreate the database.
Modify Default Settings
If you do not want to modify any settings of the NPS database, skip this section and go to Recreate the Database
-
Open the databaseSetup.cfg file from the following directory:
-
On Windows:%NPSInstallDir%\config
-
On Linux:$NPSInstallDir/config
-
-
Make the following changes:
-
Cache settings:
-
To allocate a specific volume to the main cache, specify a value in MB for the Db.Cfg.Iqmc property.
For example, to allocate 12 GB for the main cache, specify Db.Cfg.Iqmc=12288.
-
To allocate a specific volume to the temporary cache, specify a value in MB for the Db.Cfg.Iqtc property
For example, to allocate 12 GB for the temporary cache, specify Db.Cfg.Iqtc=12288.
-
-
Dbspace settings:
-
Number of Dbspace files:
By default, NPS creates 20 Dbspace files. You can configure NPS to create more Dbspace files by appending additional Db.DbFile lines under the line Db.DbFile.020.
For example:
Db.DbFile.021=default
Db.DbFile.022=default.
-
Dbspace location:
If you want to store the Dbspace files in a non-default location in a non-default file, you can specify the location by replacing default with the complete path to the file.
For example:
Db.DbFile.021=C:\Data\user_main_021.iq
File name must have the extension iq.
-
-
- Save the file.
-
Log on to the NPS system as root or administrator. In a distributed deployment of NPS, log on to the DB Server as root or administrator.
-
Take a backup of the NPS database. For more information, see To back up the NPS data:
-
Open a command line console, and then run the following command:
resetSPI.ovpl
-
Select the option 2.
This option deletes the database, creates a new database, and then restores the archived data.
After processing, deleting, and recreating the database, the command shows the following message:
Do you want to start the ETL service now? (Y/N)
-
Type N,and then press Enter. The following message appears:
Hit Enter key to exit...
-
Press Enter.
- Run the resetSPI.ovpl command again.
-
Select the option 5.
This option deletes the database (along with the archived data), and then creates a new database.
After processing, deleting, and recreating the database, the command shows the following message:
Hit Enter key to exit...
- Press Enter.
-
Start the ETL process:
startETL.ovpl
Tune NPS
This chapter describes how to fine-tune different settings for an optimal performance of NPS in a large environment.
Tune the Business Intelligence Server
The Business Intelligence Server enables you to generate insightful, web-based reports from the data in the database. The performance of the Business Intelligence Server depends on the number of scheduled reports and jobs, number of users trying to launch reports concurrently, and the underlying hardware. You can adjust the values of certain configuration parameters to resolve degrading performance of the Business Intelligence Server (or problems with launching reports) in a very large scale environment. This chapter provides guidelines for adjusting the configuration parameters to address performance issues.
Common symptoms of performance problems with the Business Intelligence Server are:
-
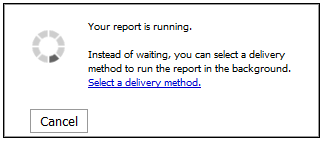
Report takes a very long time to appear; the Select a delivery method prompt remains visible for a very long time.
- The NPS console shows a blank page instead of the report
- Error messages appear in the Cognos.log file (available in %npsdatadir%\logs on Windows, in /var/opt/NNMPerformanceSPI/logs on Linux)
In a distributed deployment of NPS, the UiBi Server hosts the Business Intelligence Server component.
Monitor the Performance of the Business Intelligence Server
You can monitor the performance of the Business Intelligence Server with the help of performance monitoring tools provided by the operating system.
On Windows, you can use the Windows task manager and any Windows I/O benchmarking tools.
On Linux, you can use the iostat and top commands.
You can also detect performance problems with the help of the BI Portal:
- Log on to the NNMi console as administrator.
- Click Actions > NNM iSPI Performance > Reporting - Report Menu. The NPS console opens.
- In the NPS console, click the BI Server workspace in the navigation pane.
- Click Administration. The BI Server Administration page opens.
-
In the BI Server Administration page, select Interactive activities in the Filter section, and then click Apply. The right pane displays the number of reports that are currently running.
-
Select Background activities in the Filter section, and then click Apply. The right pane displays the following details:
-
Number of reports that are running in the background (Executing)
-
Number of reports that are waiting to be run (Waiting)
-
Number of pending reports (Pending)
-
Number of suspended reports (Suspended)
Too many pending and waiting reports lead to poor performance of the Business Intelligence Server.
-
You can also check the Cognos.log file (available in %npsdatadir%\logs on Windows, in /var/opt/NNMPerformanceSPI/logs on Linux) for errors. The following error messages in the Cognos.log file indicate performance problems:
-
http-9300-55 caf 2047 1 Audit.dispatcher.caf Request Failure SecureErrorId: <date>-<time>.646-#44 Original Error: DPR-ERR-2002 Unable to execute the request because there were no connections to the process available within the configured time limit
This error indicates that the system has too many reports currently in progress.
To avoid this error, follow the steps in the Configure Business Intelligence Server Settings section.
-
-567911568 QOS 5000 1 Audit.RTUsage.QOS <message code="-232" severity="error" title="QE-DEF-0459 CCLException" type="general">RQP-DEF-0177 An error occurred while performing operation 'sqlScrollBulkFetch' status='-232'. UDA-SQL-0107
This error indicates that NPS received an error from the underlying database.
To avoid this error, limit the number of very large-scale reports over long time periods with very fine granularity.
Best Practices
- For frequently used reports, use Report Views. See the Using Report Views section in Online Help.
- You can also schedule frequently used reports. Do not schedule high-frequency schedules for reports that are viewed rarely.
- Reports that run with very long time ranges tend to be slow and put greater load onto the database. Consider using reports with short time ranges whenever possible.
- Reports that run with very fine time grains require excess resources from NPS while creating chart images or HTML table structures with drillthrough links. Consider using fewer reports that run with very fine time grains to speed up report runs and reduce the load.
Configure Business Intelligence Server Settings
You can adjust the values of certain configuration parameters to resolve some performance problems. The changes outlined below enable the Business Intelligence Server to process more interactive report requests in parallel. This will place a larger load on the database server, but may be appropriate for a distributed deployment of NPS with multiple users all requesting reports simultaneously.
- Log on to the NNMi console as administrator.
- Click Actions > NNM iSPI Performance > Reporting - Report Menu. The NPS console opens.
- In the NPS console, click the BI Server workspace in the navigation pane.
-
Click Administration. The BI Server Administration page opens.
- In the BI Server Administration page, go to the Configuration tab.
- In the left pane, click Dispatchers and Services.
-
Click the dispatcher on the Configuration page.
You may see multiple dispatchers on this page if you used the configureWebAccess.ovpl command to change the default communication port of NPS. On the Configuration page, each dispatcher appears in the following format:
<hostname>:<port>/p2pd
In this instance, <hostname> is the hostname of the NPS system; <port> is the communication port for NPS.
When you see multiple dispatchers, choose the active dispatcher that runs with the current NPS port.
-
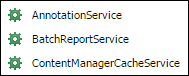
Modify the BatchReportService parameters by:
-
In the list of services, locate BatchReportService.
-
Against BatchReportService, click
 .
. -
Go to the Settings tab.
-
You can modify the following properties:
Property Default
Suggested
Maximum Value
Number of high affinity connections for the batch report service
during non-peak period
2 2 Number of low affinity connections for the batch report service
during non-peak period
4 10 Maximum number of processes for the batch report service
during non-peak period
2 10 Number of high affinity connections for the batch report service
during peak period
2 2 Number of low affinity connections for the batch service during peak period 4 10 Maximum number of processes for the batch report service during peak period 2 10
-
-
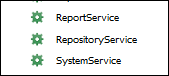
Modify the ReportService parameters by:
-
In the list of services, locate ReportService.
If you are unable to locate ReportService, click
 Next Page.
 - Against ReportService, click .
-
Go to the Settings tab.
-
You can modify the following properties:
Property Default
Suggested Maximum
Value
Number of high affinity connections for the report service
during non-peak period
2 10 Number of low affinity connections for the report service during
non-peak period
8 10 Maximum number of processes for the report service during
non-peak period
2 10 Number of high affinity connections for the report service
during peak period
2 10 Number of low affinity connections for the report service during
peak period
8 10 Maximum number of processes for the report service during
peak period
2 10
-
-
Click OK. Changes take effect immediately.
Resolve Problems with Jobs and Report Scheduling
To resolve problems with jobs and report scheduling, modify the max online engines parameter. If you see problems like scheduled reports failing to run or configured jobs not appearing in the navigation panel:
- Log on to the NPS system (the UiBi Server in case of a distributed deployment of NPS).
-
Open the following file with a text editor:
On Windows:
%npsinstalldir%\nonOV\sybasease\ASE-15_0\ASECONTENTSERVER.cfg
On Linux:
/opt/OV/nonOV/sybasease/ASE-15_0/ASECONTENTSERVER.cfg
-
Set the value of the max online engines property to an integer (recommended value is 2 for a standalone NPS; set it to a value higher than 2 in a distributed deployment of NPS).
-
If you see the error message CM-SYS-5025 Content Manager cannot update an object in the Cognos.log file (available in %npsdatadir%\logs on Windows, in /var/opt/NNMPerformanceSPI/logs on Linux), set the procedure cache size property to a higher value.
-
Run the following commands:
stopCS.ovpl
startCS.ovpl
Tune the NPS Database
The NPS database stores the data used for building reports. The performance of the database depends on the database configuration, volume of data stored in the database, the number of scheduled reports and jobs, number of users trying to launch reports concurrently, and the underlying hardware.
In a very large scale environment, you can adjust the values of certain configuration parameters to resolve degrading performance. This chapter provides guidelines for adjusting the configuration parameters to address performance issues.
You can configure the perfspi.cfg file to modify the NPS database to use non-default values for the main and temporary cache of the database.
To change the default cache size:
-
Log on to the NPS system as root or administrator. In a distributed deployment of NPS, log on to the DB Server as root or administrator.
-
Go to the following directory:
On Windows:
%npsdatadir%\database
On Linux:
$NPSDataDir/database
-
Open the perfspi.cfg file with a text editor.
-
Specify the temporary cache size (in MB) against the -iqtc property.
- Specify the main cache size (in MB) against the -iqmc property.
-
Save the file.
-
Run the following commands to restart the database:
-
stopDB.ovpl
- startDB.ovpl
-
Log Files
NPS creates the following log files in the logs directory:
The log directory is located in:
On Windows
%npsdatadir%\NNMPerformanceSPI
On Linux
/var/opt/OV/NNMPerformanceSPI/
| File Name |
Description |
| prspi.log |
Contains all operational details of NPS. |
| perfspi.srv.log |
Contains all operational details of the Sybase IQ database used by NPS. This file can grow up to 512 MB. |
| perfspi.iqmsg | Sybase IQ messages file. This file can grow up to 512 MB. |
| dbproxy.log |
Records all database queries triggered by NPS. |
| perfspiUI.log | Log file created and updated by the Business Intelligence Server and content store. |