


Console Features Useful for Configuration Tasks
When configuring settings for NNMi, you create configuration object instances. For example, to create a new URL action, you must create a new URL action instance. As another example, to specify configuration settings for discovery, you might create object instances that contain ranges of IP addresses that you want NNMi to use as hints for Spiral Discovery.
You can also enable or disable configuration object instances.
Configuration Workspaces
NNMi administrators use the Configuration workspaces to configure the following items related to NNMi.
Note On tables in configuration forms, if the cursor changes to indicate a hyperlink when you mouse over a column heading, you are able to sort the column’s data. You cannot change the sort on some of the tables on the forms in the configuration workspace.
| Name | Description |
|---|---|
| Communication Configuration | Use to configure how NNMi uses ICMP and SNMP in your network environment. See Configure communication protocol. |
| Discovery → Discovery Configuration | Use to specify the devices to be discovered. See Discover Your Network. |
| Discovery → Seeds | A discovery seed is a specific node that you want NNMi to discover. Discovery seeds are sometimes optional and sometimes required. See Specify discovery seeds. |
| Discovery → Tenants |
Each Node must be assigned to a Tenant. NNMi provides a Tenant named Default Tenant. NNMi administrators can create additional Tenant objects as needed. Auto-Discovery is available only for the Default Tenant. See Configure tenants. Note If your network management environment includes overlapping address domains, you must configure each domain as a unique Tenant. |
| Discovery → Overlapping Address Mappings |
If static Network Address Translation (NAT) is part of your network management domain, and the NNMi management server is outside of that static NAT domain, you can configure NNMi to display the NAT external IP address (public address) in the Mapped Address attribute of the IP Address form for a NAT internal IP address (such as a private IPv4 address) pair. See Overlapping Address Mapping. |
| Monitoring → Monitoring Configuration | Use to enable the NNMi State Poller. See Monitor Network Health. |
| Monitoring → Custom Poller Configuration | Use to configure SNMP MIB Expressions that specify additional information NNMi should poll. See Create Custom Polling Configurations |
| Incidents → Incident Configuration | Use to specify the information displayed with an incident, including its name, the message you want to be displayed, the way it should be categorized, its initial status, and how you want to identify duplicate traps. See Configure Incidents. |
| Incidents → SNMP Trap Configurations | Use to configure incidents that originate from an SNMP trap. |
| Incidents → Syslog Message Configurations | ArcSight. Use to map syslog information to a Syslog Message incident configuration. |
| Incidents → Management Event Configurations | Use to configure incidents that are generated from the NNMi Causal Engine. |
| Incidents → Pairwise Configurations | Use the Pairwise Configuration to pair the occurrence of one incident with another subsequent incident. See About Pairwise Configurations. |
| Incidents → Custom Correlation Configuration | Use to correlate groups of incidents under a Parent Incident. |
|
Incidents → Trap Server → Trap Forwarding Configuration |
Use to forward SNMP trap to other servers in your network environment. See Configure Trap Forwarding. |
| Incidents → Trap Server → Trap Logging Configuration | Use to configure how SNMP traps should appear in the trap.log and trap.csv log files. See Trap Logging Configuration Form |
| Status Configuration |
Use to configure Node Group status calculations using either of the following methods:
|
| Global Network Management | (NNMi Advanced - Global Network Management feature) Use to configure communication between Global Managers and Regional Managers in your network environment. See Connect Multiple NNMi Management Servers (NNMi Advanced). |
|
User Interface → User Interface Configuration |
Use to configure many user interface features:
See Configure the NNMi User Interface. Default Map Settings tab - Use to configure the default settings for map views. These settings can be overridden for a specific map using the Node Group Map Settings tab. See Configure Maps. Default Line Graph Settings tab - Use to configure the SNMP MIB data that you want to make available to your network operators in a graph format. This graph is available through the Actions menu and displays in real time. See Configure Default Settings for Line Graph. You can also right-click any object in a table or map view to access the items available within the Actions menu. |
| User Interface → Node Group Map Settings |
- Use to specify the Node Group and background image to be used in a Node Group map. Map settings include the following:
|
| User Interface → Menus | Use to configure how menu items are nested in the NNMi console. See Configure Menus. |
| User Interface → Menu Items | Use to make changes or additions to the items available in the Actions menu. See Configure Menu Items for more information. |
| User Interface → Icons | Use to customize the icons associated with a Device Profile or specific Nodes. These icons appear in table views, menu items, and as foreground images on an NNMi topology map. See Customize Device Profile Icons. |
| Security |
Use to map the following objects to control access to the network:
|
| MIBs → Loaded MIBs | Use to determine the MIBs loaded on the NNMi management server. See Available MIBs Files and MIB Variables. |
| MIBs → MIB Variables | Use to determine the MIB Variables available from all installed MIB files. See MIB Variable Form and Available MIBs Files and MIB Variables. |
| MIBs → MIB Notifications | Enables you to view the SNMP trap information, if any, that is defined by the selected MIB. See MIB Notification Form and Load SNMP Trap Incident Configurations. |
| MIB → MIB Textual Conventions | Use to examine the format rules for the selected Textual Convention that are defined in the MIB. NNMi uses these MIB format rules to determine how to display any associated MIB variable values of type Octet String. See the MIB Textual Convention Form. |
| MIBs → MIB Expressions | Use to determine the MIB Expressions available for Custom Poller or Line Graphs. See Create a Custom Poller Collection and Configure SNMP Line Graph Actions. |
| MIBs → MIB OID Types | If you find that the results of a MIB Expression displayed in a Line Graph or a Gauge or used by Custom Poller are not as expected, use the MIB OID Types configuration to override values for the following items for a MIB Object Identifier (OID). See Override MIB OID Types. |
| MIBs → ifTypes | Use to determine the list of available interface types. NNMi administrators use these ifType values to define Interface Groups. See Add New ifType Values (Interface Types) to the List. |
| Device Profiles | Use to see and edit device profile information. Device profile information includes the SNMP object ID, model, and vendor. See Configure Device Profiles. |
| Object Groups → Node Groups | Use to group your devices for viewing and monitoring purposes. See Create Node Groups. |
| Object Groups → Interface Groups | Use to group your devices for viewing and monitoring purposes. See Create Interface Groups. |
| RAMS Servers | (NNMi Advanced, plus Route Analytics Management System (RAMS) for MPLS WAN) Use to configure sources of Route Analytics Management System data for NNMi to use. See RAMS MPLS WAN Configuration (NNMi Advanced). |
Actions Menu
Using the Actions menu, you can enable or disable one or more of the following configurations:
Note When you enable or disable a configuration, NNMi assigns the value Customer as the Author name. See Author form for important information.
| Configuration | Configuration Workspace Option |
|---|---|
| SNMP Trap Incidents | Incidents |
| Syslog Messages Incidents | Incidents |
| Management Event Incidents | Incidents |
| Pairwise | Pairwise Configuration |
| Menus | User Interface Configuration |
| Menu Items | User Interface Configuration |
To enable an NNMi configuration:
- Navigate to the table view of the configurations you want to change. For example, select User Interface Configuration from the Configuration workspace and select the Menus tab.
- To enable a configuration, select the row representing the configuration you want to enable.
-
Select Actions → Enable Configuration.
If you are in the configuration form, NNMi selects Enabled
 .
.If you are in the table view, NNMi displays a
 check in the Enabled column for each instance selected.
To disable an NNMi configuration:
- Navigate to the table view of the configurations you want to change. For example, select User Interface Configuration from the Configuration workspace and select the Menus tab.
-
Do one of the following:
- To disable a configuration, select the row representing the configuration you want to edit.
- To disable more than one configuration, press Ctrl-Click to select each row that represents a configuration instance that you want to disable.
-
Select Actions → Disable Configuration.
If you are in the configuration form, NNMi removes the check mark from Enabled
 .
.If you are in the table view, NNMi removes the
check mark in the Enabled column for each instance selected.
Lookup Fields
Lookup fields have the following icon:  .
.
The Lookup field represents an associated object instance. For example, an Incident form has an associated Source Node attribute. Information about this source node is available in and accessed through the Lookup field.
| Option | Description |
|---|---|
 Show Analysis Show Analysis |
Display Analysis Pane information for the selected object. |
 Quick Find Quick Find |
Display a list of valid choices for populating the current attribute field. |
 Open Open |
Open the form for the related object instance that is currently selected in the lookup field. Review all attributes of the related object. Depending on your role, you can edit these attributes. |
|
|
Create a new object instance to relate to the current object. |
You can use Lookup fields in a variety of ways:
- Read-only fields - to provide additional information about the associated object. Click Show Analysis or Open to see the details of this object.

-
Selection fields - to change the association to another object instance. Click
Quick Find to select from a list of previously configured objects. 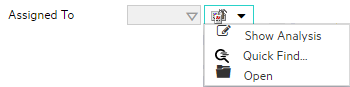
Or type a case-sensitive string into the input box .
- Read-write fields - create an entirely new object instance for this association. Click
 New. An empty form opens for you to fill in, creating a new object instance.
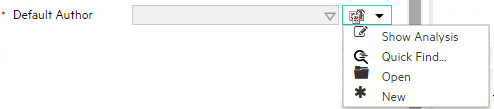
The Quick Find option is available only in Lookup fields that are modifiable. Use the Quick Find option to see the list of available object instances appropriate for populating the current Lookup field.
To list all existing object instances that could be related to the current object:
-
From the lookup field of interest, click the
Look up icon:
-
Select
Quick Find.NNMi displays a table view of object instances that are available to associate with to the current object instance.
-
In the Quick Find window, do one of the following:

Click the Clear button to remove an association with this object. The Quick Find window closes, and the current lookup field is empty. 
Select a row in the table, and click the OK button. The Quick Find window closes, and the object instance you selected populates the current lookup field. 
Click the Cancel button to return to the previous form without making any changes
The autocomplete feature is available only in Lookup fields that are modifiable. As you type, NNMi lists the available object instances for populating the current Lookup field.
To use the autocomplete feature:
-
Start typing the first few letters (case-sensitive) of the name of the object you want to associate with the current one.

The Lookup field displays a drop-down list below the input field. This list includes all potential existing objects with names that match the letters as you enter them.
-
Use the scroll arrows or the mouse to select from the displayed list.
The selected object populates the Lookup field and is now associated with the current object.
Form Toolbar
You can save time by generating a new form from within another form. The new form is based on the object type for the original form and contains only the default values set by NNMi for particular attributes for that object. Any attributes that have no default value appear blank.
This feature is useful when you want to create multiple object instances that have similar attribute values.
To create a new object instance using the form toolbar:
- Open the form representing the object of interest.
-
From the form toolbar, click the
 Save and New icon.
A new form appears that contains the default attribute values for the object type represented by the original form.
- Select the
 Save and Close icon to save your changes and return to the view.