


Manage topology
With NNMi, discovery is ongoing. After initial discovery, NNMi checks periodically to ensure that the maps accurately reflect the state of your network. By default, NNMi uses the following methods to keep network information accurate and up-to-date:
Spiral Discovery. NNMi tracks MAC addresses in addition to IP addresses so that NNMi knows when devices move from place to place in your network environment.
Scheduled Rediscovery. Rediscovery occurs automatically at the interval you define.
Optional: Auto-Discovery (Default Tenant only). If you choose to use Auto-Discovery, NNMi uses information gathered from neighboring devices on your network to discover all devices connected to your network.
Delete nodes
Sometimes it is useful to delete Nodes. For example:
- Remove any nodes that are no longer being used in the network.
- Avoid reaching the NNMi license limit for number of managed Nodes by deleting less important Nodes.
- When non-SNMP addresses that had the same DNS hostname are changed to have separate DNS hostnames, NNMi must completely rediscover the non-SNMP nodes to correctly update the database objects (for example, node, interface, address, connection, and incidents).
-
Remove any virtual machine nodes that are no longer hosted on a hypervisor.
Tip Use the Virtual Machines Node Group provided by NNMi and filter by
Hosted On = nullto identify VMs that are no longer hosted on a hypervisor.
If you delete a Node with many interfaces and VLANs, you might see an error message indicating that the Node could not be deleted. This means the database was busy with discovery. Try again between discovery cycles.
If a deleted Node is one of your seeds, delete that seed from the Discovery Seeds table as well.
To understand the results of deleting a Node:
-
NNMi cleans up the database by deleting the following objects:
- Any objects associated with the deleted Node (for example, all of that node's interfaces and IP addresses).
- Any related objects that are empty after deleting the Node (for example, subnets).
- Any connections with only zero or one end points after deleting the Node.
- The History of the Node object and all related objects.
- The time required for NNMi to finish deleting depends on the number of objects or related objects being deleted.
- During future discovery cycles, if the deleted Node meets the criteria for an Auto-Discovery Rule and appears in a monitored router's ARP cache, NNMi adds the Node back into the NNMi database during the next discovery cycle. To prevent this, create an Excluded IP Addresses filter for the addresses.
- During future monitoring cycles, NNMi polls only objects currently in the database.
-
Each Incident associated with the deleted Node is modified in the following ways, but not deleted from the NNMi database:
- The Status attribute changes to Closed.
- The Correlation Notes indicate the deletion of the associated node, interface, or address.
- The RCA State attribute changes to FALSE.
Note Incidents generated from SNMP traps (received from the deleted Node) appear in the Incident views, but remain unresolved.
- If you are viewing a Node that has recently been deleted by another user, the deleted Node appears as a transparent icon on the map until the map is refreshed using the
 Refresh icon. After Refresh, the deleted node is removed from the map. NNMi does not automatically refresh the connectivity or set of nodes in a map view, except on the Initial Discovery Progress and Network Overview maps.
A subset of NNMi users can delete nodes from a table view, map view, or Node form (depending on the assigned NNMi Role).
By default NNMi Administrators can delete nodes. NNMi Administrators can configure NNMi to permit User Accounts assigned to the NNMi Operator Level 2 User Group to delete nodes.
To delete one or more nodes (maximum 20 at one time):
-
Unmanage the nodes you want to delete.
- In a table view, press Ctrl-Click to select each row that represents a node you want to unmanage.
-
Select Actions → Management Mode → Unmanage.
You can also right-click any object in a table or map view to access the items available within the Actions menu. -
Wait until the Status=No Status for each of the following objects:
- Each Node to be deleted
- Each Node's Interfaces, IP Addresses, Cards, Ports, and VLAN Ports
-
Do one of the following:
- Table views: Press Ctrl-Click to select each row that represents the objects of interest, and click the
 Delete icon. Each selected node is deleted from the NNMi database and removed from the current view.
 - Map views: click the map symbol representing the node you want to delete, and click File → Delete Node. The node is deleted from the NNMi database and removed from the current view.
- Node form: select File → Delete Node and in the confirmation dialog, click OK. The form is automatically closed after NNMi deletes the Node.
If the delete fails, use the nnmnodedelete.ovpl command. Wait for the command to complete.
- Table views: Press Ctrl-Click to select each row that represents the objects of interest, and click the
To delete any number of nodes:
Use the nnmnodedelete.ovpl command.
Delete discovery seeds
There are two ways to delete discovery seeds from the NNMi Discovery configuration and the NNMi database.
If you remove a Discovery Seed from Discovery Configuration, the corresponding node is not deleted from the topology database.
To delete seeds using the Discovery Configuration view:
-
Navigate to the Seeds view.
- From the workspace navigation panel, select the
 Configuration workspace.
 - Expand Discovery.
- Select Seeds.
- From the workspace navigation panel, select the
- To delete one or more discovery seeds, press Ctrl-Click to select each row that represents a node you want to delete.
- Click the Delete icon.
To delete any number of seeds at one time from the command line:
For the alternate method of configuring Discovery Seeds, see the nnmseeddelete.ovpl Reference Page.
If you do not want to enter an NNMi User Name attribute value and an NNMi Password attribute value at the command line, you can use the nnmsetcmduserpw.ovpl command to specify the valid user name and password (instead of -u and -p). The credentials set using the nnmsetcmduserpw.ovpl command are valid for command execution by the same user.
Detect interface changes
During each Spiral Discovery cycle, NNMi responds to Interface changes as follows:
-
NNMi updates the attribute value of the current Interface object if one (and only one) of the following attributes change:
ifIndexorIfAliasorifSpeed
-
NNMi creates a new Interface object and deletes the old Interface object if any of the following criteria are met:
- At least one of these attributes change:
ifName,ifDescr(descriptions),ifType, or Physical Address (Mac address, Media Access Control address). - More than one of these attributes change:
ifIndexorIfAliasorifSpeed. - One or more attributes from the list of both criteria 1 & 2 change.
Note If using nnmconnedit.ovpl configuration files, any connection settings configured for the deleted Interface would be evaluated for the new Interface object’s current attribute settings.
- At least one of these attributes change:
To troubleshoot interface changes in your network environment, do one of the following:
-
For immediate results, navigate to a Node view and select one of the problem devices.
Click Actions → Polling → Configuration Poll to instruct Spiral Discovery to rediscover the Node, updating information about interfaces within that device.
You can also right-click any object in a table or map view to access the items available within the Actions menu.Open the Node form for the device and verify that the list of interfaces is correct.
-
Wait until the next regularly scheduled Discovery or Monitoring cycle (controlled by the Interval settings the NNMi administrator specifies in the Discovery and Monitoring configuration forms).
NNMi administrators use multiple configuration settings to control how NNMi detects interface changes. To troubleshoot issues, verify the current settings for the following:
-
Prerequisite: To detect interface changes, the Configuration > Monitoring >
 Enable Interface Fault Polling must be enabled. This setting is available at three levels:
- Interface Settings tab > Interface Settings form > Fault Monitoring section
- Node Settings tab > Node Settings form > Fault Monitoring section
- Default Settings tab: Default Fault Monitoring section
If enabled and the NNMi State Poller detects a change, NNMi does the following:
- Generates a request for Spiral Discovery to rediscover the Node (checking for any changes). If NNMi is busy gathering other information, it may take a while for this request to get to the top of the queue. If NNMi is not busy, the results might seem immediate.
- Suspends monitoring of that node until NNMi finishes gathering the updated information about the Node itself (or for 30 minutes maximum).
-
Configuration > Monitoring > Monitoring Configuration's Default Settings tab, Default Change Detection Monitoring block of attributes. If Number of Interfaces (ifNumber) Polling
is enabled, NNMi does the following:- Polls for the total number of interfaces within the Node by requesting an SNMP response to MIB II
ifNumber. - NNMi compares the answer for total number of interfaces within the Node, to the previous answer from that Node's SNMP agent.
- If the number has changed, Spiral Discovery redisovers the Node.
- NNMi suspends fault, performance, and status monitoring of that Node until updated information about hardware is gathered.
Tip This setting detects whether the total number of interfaces within the node has increased or decreased. To detect whether the actual number assigned to particular interfaces has changed (the
ifIndexvalue), continue with the next step. - Polls for the total number of interfaces within the Node by requesting an SNMP response to MIB II
-
For each node vendor/make/model (RFC 1213, MIB-II,
sysObjectID), the NNMi administrator chooses which interface MIB variable the NNMi State Poller queries to detect interface changes.Configuration > Device Profiles: On the Advanced tab, the Interface Reindexing Types attribute instructs NNMi to do the following.
Interface Reindexing Types MIB II Variable Used to Detect a Change How State Poller Detect Changes ifIndexvalueUse
ifIndexonly for manufacturers/models that maintain a staticifIndexlist.If an SNMP agent's previous response for SNMP
ifIndexvalues (numbers assigned to each interface) does not match the current response, State Poller requests that NNMi gather new information about the interfaces within the Node.For example, someone installs or removes interfaces from a device in your network:
-
Use this MIB-II
IfIndexsetting for devices that maintain a static list of MIB-IIIfIndexnumbers.- When interfaces are added - MIB-II
IfIndexnumbers are added to the end of the current list of interfaces contained in that device. - When interfaces are removed - the MIB-II
IfIndexnumbers previously used by those interfaces are dropped from the list.
- When interfaces are added - MIB-II
- Do not use this MIB-II
IfIndexsetting for devices that reset all MIB-IIIfIndexnumbers for the group of interfaces contained in that device each time a change occurs. Each manufacturer has a different strategy for identifying each interface and detecting when an existing interface is simply assigned to a different MIB-IIIfIndexnumber or an interface is removed.
Caution When you choose
ifIndex, NNMi can detect when a particular number no longer exists (static assignments). However, this choice might not detect interface renumbering (a value now being used by a different interface). To detect this type of interface renumbering, choose any combination ofifNameandifDescrandifAliassettings, below.ifNamevalueBased on the ifIndexnumber, compares theifNamevalue on the interface with the previously discoveredifNamevalue. If changes in this name/number relationship are detected, State Poller requests NNMi to gather new information about the Node's interfaces.ifDescrvalueBased on the ifIndexnumber, compares theifDescrvalue on the interface with the previously discoveredifDescrvalue. If changes in this description/number relationship are detected, State Poller requests NNMi to gather new information about the Node's interfaces.ifAliasvalueBased on the ifIndexnumber, compares theifAliasvalue on the interface with the previously discoveredifAliasvalue. If changes in this alias/number relationship are detected, State Poller requests NNMi to gather new information about the Node's interfaces.Combination of ifNameorifDescrvaluesBased on the ifIndexnumber, compares theifDescrandifNamevalues on the interface with the previously discovered values. If changes are detected, State Poller requests NNMi to gather new information about the Node's interfaces.Combination of ifNameorifDescrorifAliasvaluesBased on the ifIndexnumber, compares theifNameandifDescrandifAliasvalues on the interface with the previously discovered values. If changes are detected, State Poller requests NNMi to gather new information about the Node's interfaces.Tip Open any Node form and navigate to the Basics' Device Profile link. You can open the associated Device Profile to see the current setting.
-
- The next time each Node is rediscovered, if something has changed, Spiral Discovery compares the current
ifIndexvalue against the MAC address to determine whether an interface was added, deleted, or renumbered.
Add or delete a Layer 2 connection
Layer 2 Connections are only permitted between the Default Tenant, and other Tenants (never between two non-Default Tenants).
If your network management domain includes ATM, Frame Relay, or MPLSMultiprotocol Label Switching links between wide area networks (WANs), you might need to use the connection editor to show the links in the Layer 2 Neighbor View maps within NNMi. For MPLS, you can provide multiple connections between two nodes.
Subnet Connection Rules
Subnet Connection Rules are ideal for multiple situations.
NNMi uses Subnet Connection Rules to detect connections between interfaces associated with IP addresses that do not respond to Layer 2 discovery protocols (see the list of Topology Source protocols in Layer 2 Connection Form). Subnet Connection Rules take priority over the Layer 2 discovery protocol results. For special cases, you can override a Subnet Connection Rule by using the Connection Editor command line tool, see nnmconnedit.ovpl for more information.
NNMi provides a variety of predefined Subnet Connection Rules.
Connection Editor (to add or delete connections)
In the Inventory workspace > Layer 2 Connections view, you can see a list of connections. No Delete action is available in the Layer 2 Connections view.
Use the nnmconnedit.ovpl command line tool to do the following:
- delete a connection data
- add connection data
- instruct NNMi to ignore certain connection data
The nnmconnedit.ovpl command is used to generate a template XML file (shown in the following example). For each connection to be added or deleted, you provide information about the node and interface at both ends of the connection. Multiple <connection> elements are permitted within the template XML file.
<connectionedits>

 <connection>

    <operation>add or delete</operation>

    <node>node Name, Hostname or management IP address</node>

    <interface>ifName, ifAlias, ifDescr or ifIndex</interface>

    <node>node Name, Hostname, or management IP address</node>

    <interface>ifName, ifAlias, ifDescr or ifIndex</interface>

  </connection>

 </connectionedits>
To add or delete a connection:
- For the devices at both ends of the connection, gather the data required to identify the device and interface (see table).
-
On the NNMi management server, at the command line, generate a connections template file using either
addto create an add.xml template file ordeleteto create a delete.xml template file.In the following example, NNMi creates an add.xml file:
nnmconnedit.ovpl -t addIf you specify add, NNMi creates the template file named
add.xml. If you use delete, the template file is nameddelete.xml. - Open the template file in a text editor and fill in the correct information for each node and interface.
-
On the NNMi management server, at the command line, load the new connection information into the NNMi database:
nnmconnedit.ovpl -f <add|delete>.xmlFor example, to load the add.xml template file, enter:
nnmconnedit.ovpl -f add.xml - Open the Layer 2 Neighbor View map and verify the connection changes.
Start discovery on-demand
NNMi provides the nnmnoderediscover.ovpl command line tool for initiating discovery. This tool enables NNMi administrators to do the following:
-
Run discovery of a subset of your network domain to get the most recent data without waiting for the next-regularly schedules discovery cycle.
For example: Use nnmnoderediscover.ovpl to immediately add newly deployed critical devices to the NNMi database without waiting for the next regularly-scheduled discovery cycle.
- Run discovery of your entire network on demand or using an automation script.
-
Request updated discovery results from the Regional Managers in your network environment after restoring the Global Manager to a previous state.
(NNMi Advanced - Global Network Management feature) Any change to the Node's Management Mode setting is immediately sent from a Regional Manager (NNMi management server) to the Global Manager. (Changes to Management Mode for other objects are sent during the next Spiral Discovery cycle on the Regional Manager.)
Note This tool can help you synchronize the Global Manager if for some reason the original information from the Regional Managers is lost from the Global Manager's database.
Managing VMware hypervisor-based virtual networks
The following tasks are recommended to assist you in managing and troubleshooting your VMware Hypervisor-Based Virtual Networks.
Task 1: Create a Virtual Switches Interface Group
You can identify Virtual Switches using the capability that identifies Virtual Switches: com.hp.nnm.capability.br.bridge.
To easily identify your virtual switches, create an interface group of only virtual switches:
- Navigate to Configuration > Object Groups > Interface Groups workspace.
- Click the
 New icon.
 - Enter a name such as Virtual Switches.
- Navigate to the Additional Filters tab.
- In the Attribute field, select capability.
- In the Operator field, select = (equals).
- In the Value field, type:
com.hp.nnm.capability.br.bridge -
Click Insert.

- Click the
 Save and Close icon.

Task 2: Configure NNMi to Delete Unresponsive Nodes
Virtual machines (VMs) are not automatically deleted under the following circumstances:
- An ESXi host is deleted
- Using vSphere® vMotion®, a VM is moved to an ESXi host not managed by NNMi
- A VM is deleted from an ESXi host
Before completing any of the tasks above, enable Delete Unresponsive Node if it is not already enabled. This enables NNMi to automatically delete these VMs, except under the following circumstances:
No SNMP monitoring is configured for the node and either of the following is true:
- The VM does not have any IP addresses discovered by NNMi because VMware Tools is not installed.
- The VM has one or more IP addresses, but IP Address Fault Polling is not enabled.
Tip To remedy these exceptions, install VMware Tools and be sure to monitor any subsequent IP addresses.

Task 3: Identify Virtual Machines (VMs) that are no longer hosted on a Hypervisor
Use the Virtual Machines node group provided by NNMi to identify VMs that are no longer hosted on a hypervisor:
- Navigate to the Inventory > Nodes (All Attributes) workspace.
- In the <Empty Group filter> drop down, select Virtual Machines.
- Right-click the Hosted On column.
- Select Filter > Is empty.
VMware vSphere® vMotion® might also cause VMs to temporarily appear to no longer be hosted on a hypervisor. In addition, VMs might have been initially discovered without being associated with a hypervisor. Be sure to note the Last Modified value for the nodes displayed.
Task 4: Delete Virtual Machines no longer Hosted on a Hypervisor
You might want to remove any virtual machine (VM) nodes that are no longer hosted on a hypervisor:
- Return to the Nodes (All Attributes) table view.
- Press
Ctrl-Clickto select the row for each VM you want to delete. -
Click the
Delete Node icon.

Task 5: Rediscover Virtual Machines
To rediscover any virtual machines (VMs) that have been deleted, follow these steps:
- Note the fully qualified hostname of the ESXi host on which the VMs reside.
-
Delete the ESXi host on which the VMs reside:
Caution Deleting a node also deletes the historical data that is stored for the node, including any performance statistics.
- Navigate to the Inventory > Nodes workspace.
- Double-click the row that represents the ESXi server you want to delete.
- Click the Delete Node icon.
- Delete all of the seeds that are associated with the ESXi host you deleted.
-
Use the ESXi host that was deleted as a seed for Spiral Discovery. For example:
- Navigate to Configuration > Discovery > Seeds.
- Navigate to the Seeds tab.
- Click New.
-
Enter the fully qualified hostname of the ESXi server.

-
Click the
Save and Close icon.

Task 6: Manage Virtual Machines that have Multiple Agents
Examples of virtual machines (VMs) that have multiple agents are those VMs that have an SNMP Agent and a managing Web Agent.
Follow this task under either of the following circumstance:
- You want to collect only Web Agent data on a Virtual Machine (VM) that has an SNMP Agent and a Web Agent.
- The SNMP agent has been removed from the VM that also has a Web Agent.
To ensure that a VM that has multiple agents is collecting data only from a Web Agent, follow these steps:
- Navigate to the Inventory > Nodes view.
- Select the VM that you want to delete and then click the Delete icon.
-
Configure the VM that you just deleted to no longer use SNMP Communication. To do so, add or edit the Specific Node Settings for the VM so that Enable SNMP Communication is disabled. For example to edit an existing Specific Node Settings configuration:
- Navigate to Configuration > Communication Settings.
- Navigate to the Specific Node Settings tab.
- Select the VM that was deleted.
-
Clear the
 Enable SNMP Communication check box.
- Click the Save and Close icon to save the node settings.
- Click the Save and Close icon to save this communication configuration.
-
Delete the ESXi server that is hosting the VM.
Caution Deleting a node also deletes the historical data that is stored for the node, including any performance statistics.
- Navigate to the Inventory > Nodes workspace.
- Double-click the row that represents the ESXi server you want to delete.
- Click the Delete Node icon.
- Delete the ESXi host seed.
- Click the Save and Close icon.
-
Use the ESXi host that was deleted as a seed for Spiral Discovery. For example:
- Navigate to Configuration > Discovery > Seeds.
- Navigate to the Seeds tab.
- Click the New icon.
-
Enter the fully qualified hostname of the ESXi server.
The VM is rediscovered. NNMi will no longer use the SNMP Agent to collect discovery information for the VM.

After discovery, NNMi administrators can change the Tenant settings for any Node:
- Using the nnmsecurity.ovpl command to change multiple Nodes.
- Using the Node form to change one Node's setting.
Devices that belong to the Default Tenant can have Layer 2 Connections to any device in any Tenant. Devices within any Tenant other than Default Tenant can have Layer 2 Connections only to devices within the same Tenant or the Default Tenant.
Tip Assign any infrastructure device that interconnects multiple NAT domains (such as a NAT gateway) to the Default Tenant. This ensures that NNMi displays the Layer 2 Connections your team and customers need to see.
Devices within the Default Security Group are visible from all views. To control access to a device, assign that device to a Security Group other than Default Security Group.
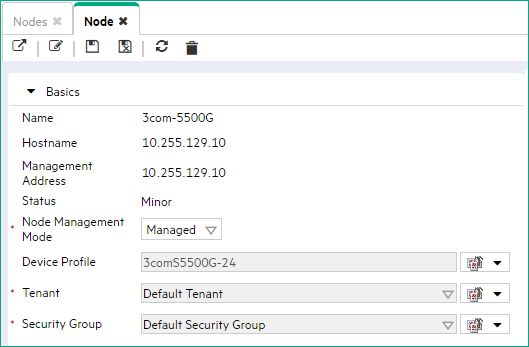
To assign a Node to a different Tenant:
-
Open the Node's form:
Until an NNMi Administrator defines at least one Tenant in addition to Default Tenant (provided by NNMi):
- The Tenant attribute does not appear on any Node form.
- The Tenant column does not appear in the Nodes (All Attributes) view.
-
In the Tenant attribute, do one of the following:
-
Select the drop-down list and choose a different Tenant.
-
Select the
 Lookup icon and select New to create a new Tenant.
-
-
Click Save and Close.
Caution Additional steps are now required:
- If the Node is currently a member of a Router Redundancy Group, NNMi creates duplicate Nodes. You must manually delete the record of this Node that is associated with the prior Router Redundancy Group/Tenant pair.
- If the Node was or is now participating in a static Network Address Translation domain, you must manually update any associated Overlapping IP Address Mapping.
-
Optional. Any seed configuration that assigned that Node to the old Tenant during initial discovery is now ignored by NNMi. Deleting the obsolete seed configuration is optional.
-
Navigate to the Seeds view.
- From the workspace navigation panel, select the Configuration workspace.
- Expand Discovery.
- Select Seeds.
- From the workspace navigation panel, select the
- Select the row for the seed configuration that assigns that Node to the old Tenant, and click the Delete icon.
-